
You've spread a chain, an old spoon, and a silver-colored bar across the kitchen table. The chain has a tiny stamp, the spoon came from a relative, and the bar looks convincing enough that you're wondering what someone would pay for it. Before you polish anything or reach for a testing chemical, you need to separate what the metal looks like from what you can prove.
Learning how to test silver purity starts with a fixed order: record the marks, inspect the construction, run non-destructive checks, and use an independent method when the result matters. Home tests can help you spot problems. They can't always establish the silver content of the entire object, especially when several tests examine the same outer coating.
Read the Stamp Before You Test
Start by separating the chain stamped 925, the spoon marked COIN, and the unmarked bar. They may look alike, but their markings make different claims. An unmarked piece isn't automatically fake, and a stamped piece isn't automatically genuine.
Fineness expresses precious-metal content in parts per thousand: a 925 mark claims 925 of every 1,000 parts by weight, or 92.5% silver, with the remainder generally made up of alloy metals such as copper, as explained in the hallmark overview. That composition is called sterling silver.
American coin silver traditionally contains approximately 90% silver; a hypothetical 100-gram sterling object therefore contains about 92.5 grams of silver, compared with about 90 grams in a coin-silver object, a difference of 2.5 grams, using the standards discussed by The Silver Society's identification guide. That distinction matters when a buyer calculates metal value.
Match the mark to its claim
The numerical conversions below follow parts-per-thousand notation. The UK hallmarking guidance notes recognize silver standards including 800, 925, 958, and 999, while also explaining the broader hallmarking system.
Silver marks and what they claim
| Mark | Claimed silver | Usual items | Stamp does not prove |
|---|---|---|---|
| 925 or STERLING | 92.5% | Jewelry and flatware | Solder, settings, or plated details are sterling |
| 958 (Britannia) | 95.8% | UK silver and some imports | Every component is silver; missing UK marks alone prove a fake |
| 999 or .999 | 99.9% | Bars and rounds | The interior matches the stamped face |
| 800 | 80% | Some European silver | The whole object has uniform composition |
| COIN or .900 | About 90% | Historical US silver coins and coin silver | A worn object or mixed lot needs no further testing |
| Silver plate, EP, or EPNS | Surface coating only | Plated base metal | A silver-related word establishes bulk purity |
Use this visual guide while locating small or worn marks.
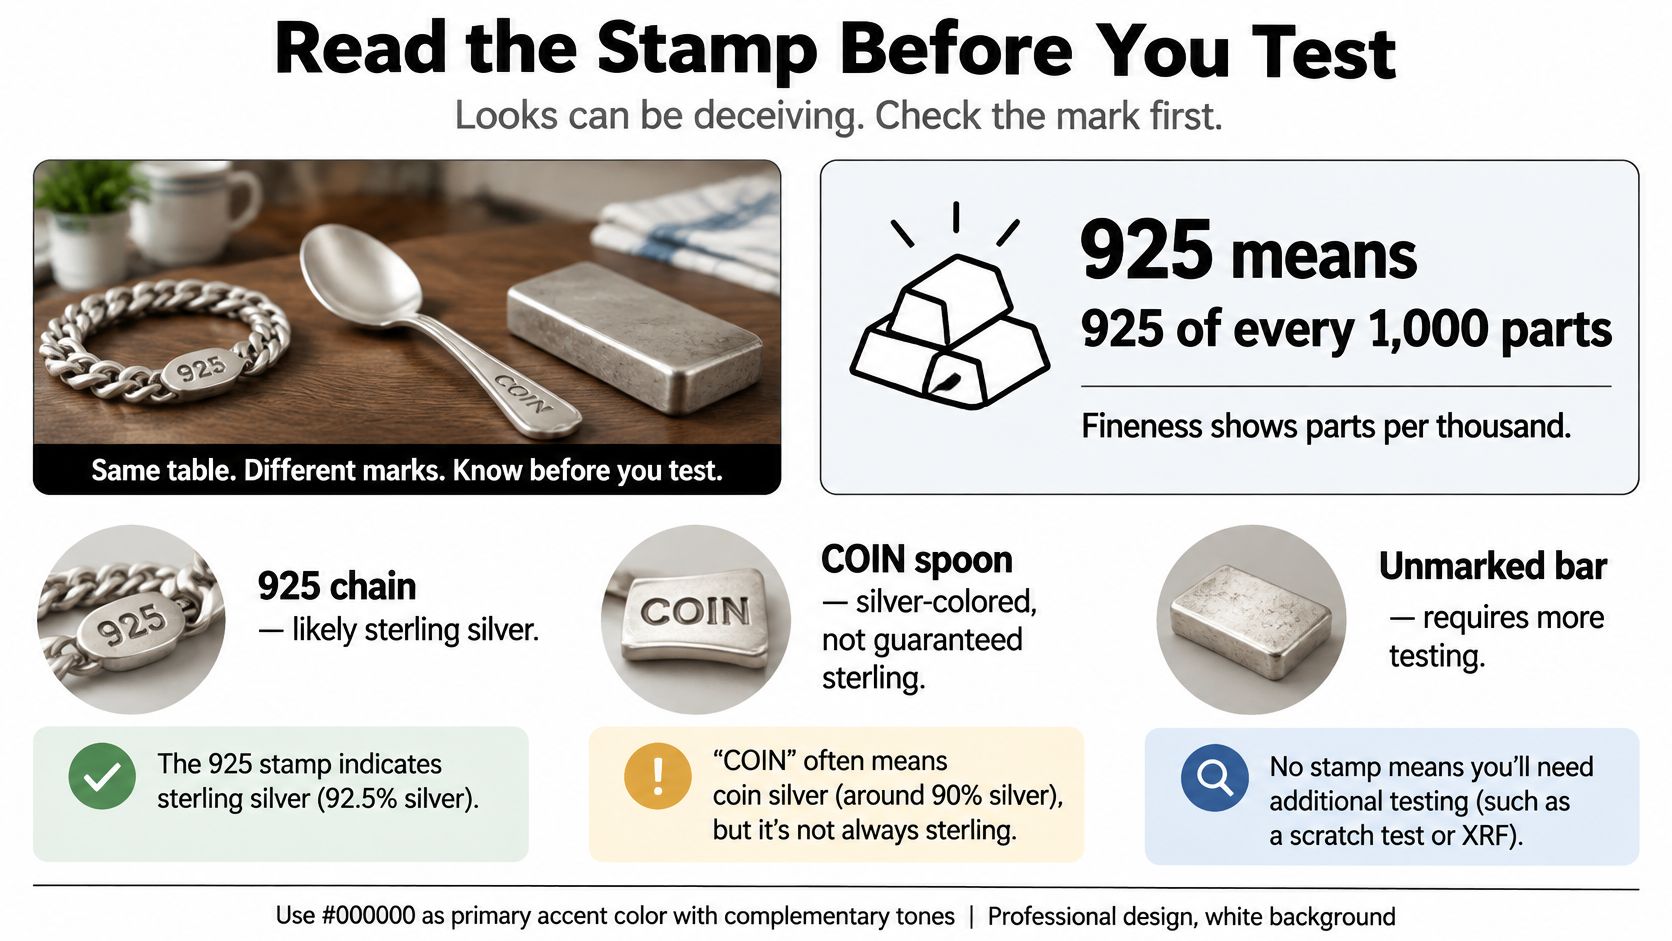
Photograph each mark before cleaning. Record its location, accompanying symbols, maker identification, and any apparent assay-office mark. A complete official hallmark connects the fineness claim to an assay process; a bare number doesn't provide that same context.
- Check chain construction. This guide to sterling silver chain style and quality provides useful context when examining links and closures.
- Separate darkening from peeling. EP Fine Jewelry's explanation of what causes silver jewelry to darken helps distinguish tarnish from an exposed underlying metal.
Treat the mark as the composition you're trying to verify, not permission to skip testing.
Which Test Matches the Piece
Before choosing a tool, decide what you need to know. Rejecting an obvious imitation, assessing an ordinary household object, and resolving a disputed bullion purchase are different jobs. The least damaging useful test should come first.
For a household spoon, careful inspection and a valid density check can support a working identification. For an expensive bar, the question is harder: does the interior match the outside? A surface test alone doesn't answer that.
Compare the methods before making a mark
Silver purity tests compared
| Method | What you learn | Damage | Main blind spot | Use it when |
|---|---|---|---|---|
| Hallmark and look | Claimed fineness and wear patterns | None | Fake, worn, or misleading stamps | Every item, first |
| Magnet | Whether strongly magnetic material is present | None | Non-magnetic imitations and steel springs | A quick initial screen |
| Ice test | How readily the object transfers heat | None on water-safe pieces | Other conductive metals behave similarly | Curiosity only, never pricing |
| Specific gravity | Bulk density relative to water | None on suitable water-safe objects | Stones, cavities, and filled construction | Solid spoons, coins, and bars |
| Nitric-acid-based test | Chemical response at a tested spot | Scratch, filing, or chemical mark | Coating, sampling depth, and solder | Suspect metal after safer checks |
| Electronic tester or XRF | Instrument-specific material response; XRF measures surface elements | Usually none | Construction and instrument limitations | Professional screening |
| Fire assay | Silver content of a laboratory sample | Sample is consumed | Unrepresentative sampling | High-value or disputed material |
Don't treat every electronic tester as an XRF analyzer. Some instruments assess electrical properties, while XRF identifies elements near the surface. Ask which technology the operator uses and whether it suits your object's shape and construction.
The United Precious Metals testing discussion highlights the central surface-testing problem: acid and XRF can both miss an underlying material, while dirt, oils, oxidation, solder, and firescale can complicate readings. A precise-looking display is not automatically a measurement of the entire object.
Choose an independent second check
Suppose a plated object has a convincing stamp and produces a silver response on its outer face. Those results agree, but neither has established the interior composition. Adding another test of the same coating may only repeat the blind spot.
A useful second method should answer a different question. Density evaluates the object as a whole, provided its construction permits that measurement. A suitable professional conductivity or ultrasonic examination can investigate properties that a surface chemical reaction doesn't establish.
> Practical rule: A clean pass is a screen. Agreement between independent methods supports a working opinion. Valuable, unusual, or disputed pieces still deserve professional evaluation.
Confidence also depends on execution. A density measurement with trapped bubbles is not independent confirmation, and an XRF scan aimed at a solder joint may describe the joint rather than the surrounding metal. Choose the method for the object, not for the most impressive-looking result.
Run the Safe Home Tests in Order
Prepare a magnifier, soft cloth, mild soap, strong magnet, digital gram scale, water container, and fine suspension thread. Keep a written record for each object so you don't accidentally assign the spoon's result to the chain.
The inspection sequence below helps preserve evidence before you consider anything destructive.
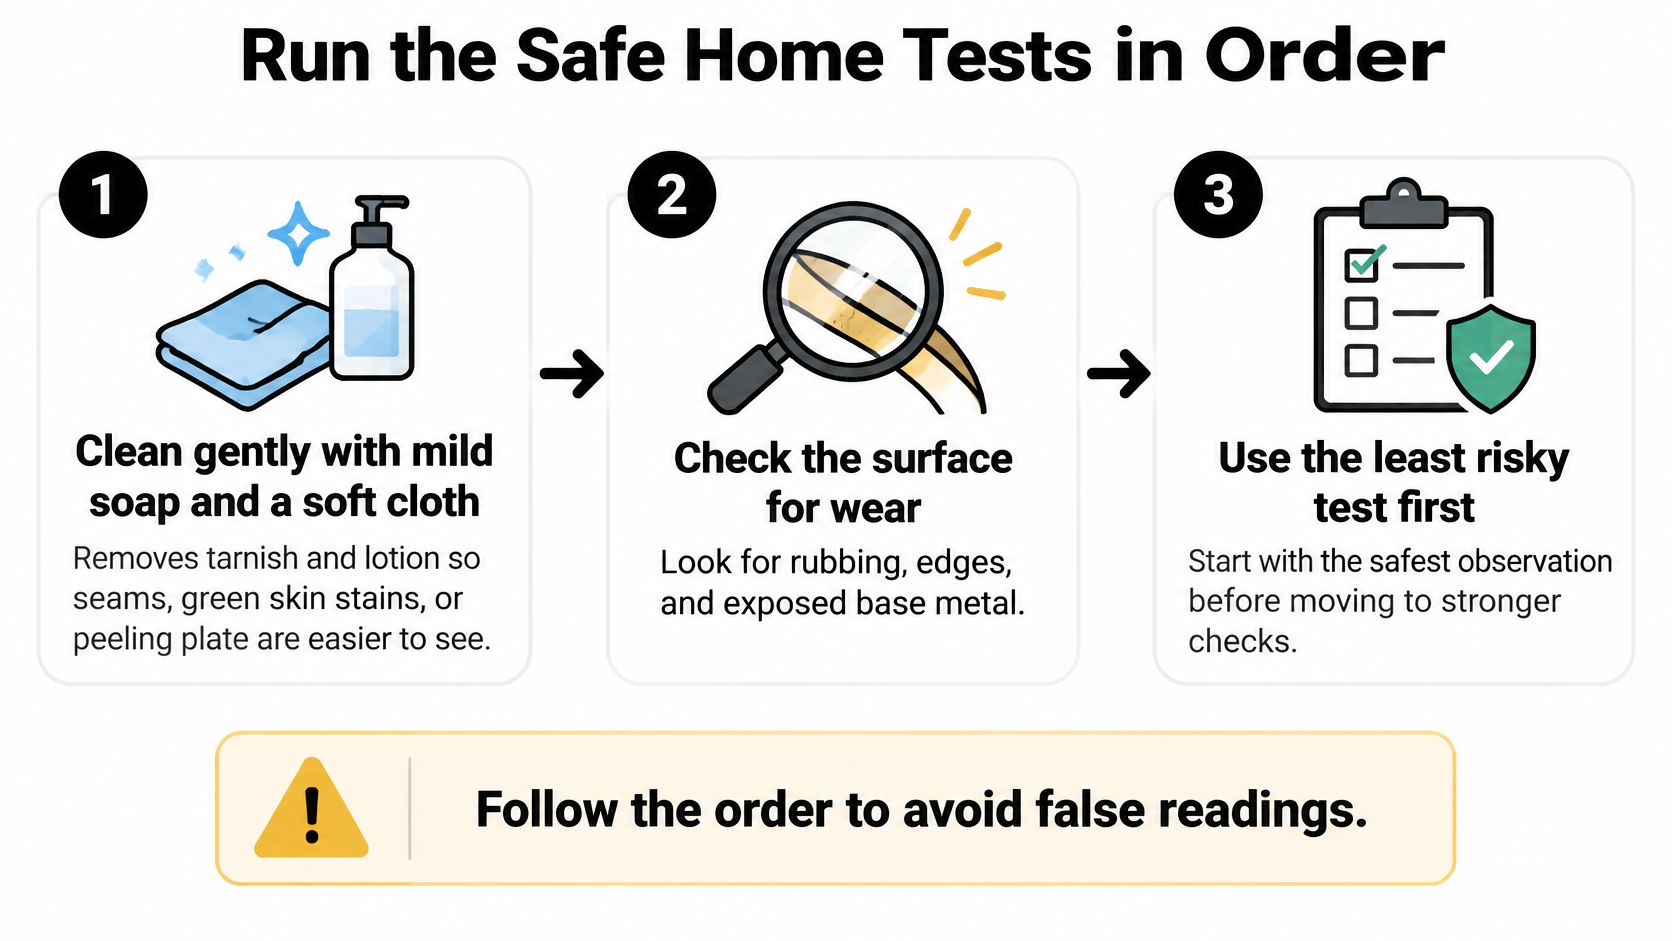
Begin with cleaning and observation
- Clean gently, only if the piece is water-safe. Use mild soap and a soft cloth to remove lotion and loose grime, then dry it. Soap won't necessarily remove tarnish, and you shouldn't scrub away patina, worn markings, or evidence of plating. Skip immersion for porous stones, glued settings, and objects with uncertain construction.
- Inspect the high-wear areas. Examine edges, clasp connections, feet, and joints under magnification. Note peeling, bubbles, seams, or a different-colored metal beneath the surface. Record stones, hollow handles, and attached components because their mass complicates later testing.
- Move the magnet across the body. Don't test only the clasp. A strong attraction identifies a magnetic component, but a clasp spring can react even when surrounding metal doesn't. No attraction merely leaves non-magnetic materials under consideration.
- Treat the ice check as optional. On a water-safe object, observe how readily an ice cube melts against the metal. Keep comparison objects at the same starting temperature and recognize that shape and contact area affect the outcome. Don't convert a fast melt into a purity judgment.
Measure density only on suitable objects
- Weigh the dry object. Record its mass in grams on a stable, level scale. The object should be clean and completely dry, and the scale should resolve small changes consistently. A heavy-looking object is not a substitute for an actual measurement.
- Measure its apparent submerged mass. Suspend the object from the scale using a suitable under-pan weighing arrangement, with the water container supported independently. Fully submerge it without touching the container, remove trapped bubbles, and record the apparent mass while submerged. Account for the suspension thread or holder rather than treating its contribution as silver.
Calculate:
Specific gravity = dry mass ÷ (dry mass − apparent submerged mass)
This setup matters. Putting the water container directly on the same scale and following that formula without adjusting the procedure mixes different measurement methods.
- Compare with an appropriate reference. Use a reliable density reference for the alloy you're investigating, not just a generic silver label. Repeat the measurement to check consistency. If stones, cavities, filler, trapped air, or a weighted handle are present, don't interpret the result as the density of the silver alloy.
> A density result describes everything included in the measurement. It doesn't subtract a stone, hidden filler, or trapped air for you.
For a visual demonstration alongside these precautions, watch the testing process before deciding whether your scale setup is suitable.
A plausible mark, an unremarkable magnet response, and a repeatable density result can justify keeping an ordinary solid object in the likely-silver group. Record that conclusion as provisional. Don't turn it into an exact fineness claim or scratch a collectible merely to make your notes feel more certain.
Use Acid and Electronic Testers Carefully
An acid bottle and an electronic instrument do different jobs, and both require more judgment than reading a color or display. Before either test, decide whether the information is worth the risk to the object.
Put chemical safety before color interpretation
Nitric acid is corrosive and can release hazardous fumes. An open kitchen window is not adequate protection for improvised testing. If you don't have appropriate chemical training, suitable ventilation, acid-compatible protective equipment, and a controlled work area, leave this test to a professional.
Keep children, pets, food, and household cleaners away from the work area. Read the product's safety data sheet before opening it, including its exposure, spill, storage, and disposal instructions. Don't improvise spill neutralization or mix testing solutions with other chemicals.
The following image shows tools you may encounter at a testing counter, not a substitute for chemical-handling precautions.
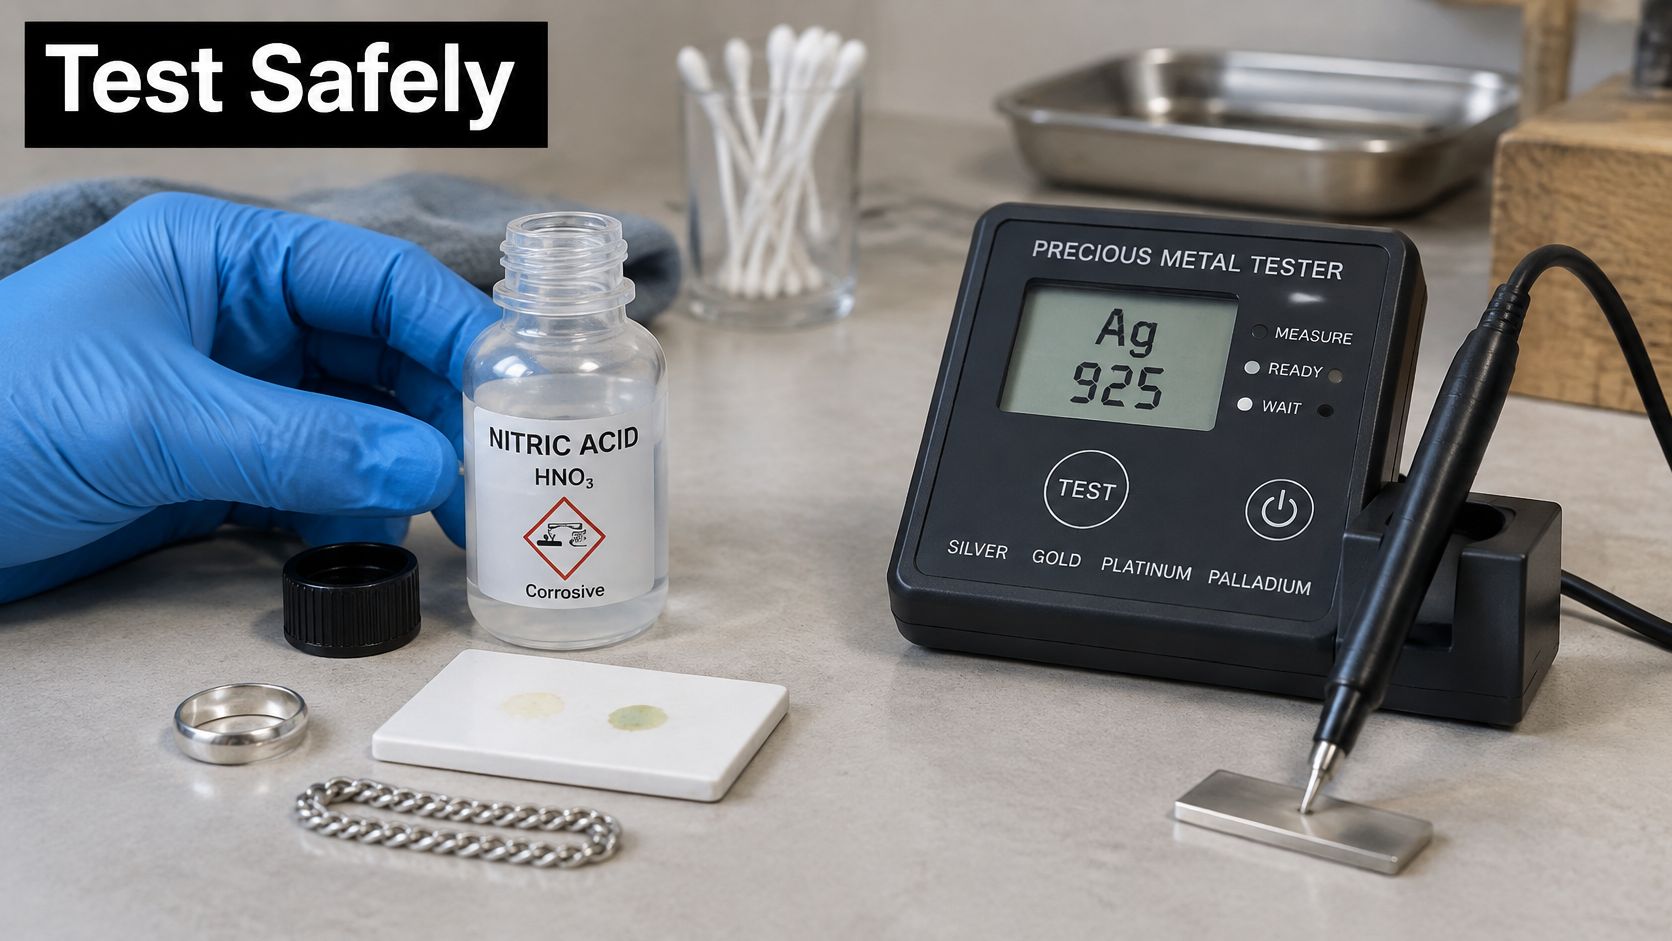
A trained tester chooses a discreet sampling location with the owner's permission. Filing can expose material beneath a coating, but it permanently alters the piece. A streak transferred to a testing stone may still represent only the coating unless the underlying metal has been reached.
- Identify the reagent. Commercial silver-testing solutions aren't interchangeable, and their color charts may differ.
- Use the matching interpretation chart. Don't apply an internet rule about a creamy, red, green, or brown reaction to an unidentified acid formulation.
- Avoid solder as the only sample. A joint can respond differently from the main body.
- Complete the cleanup properly. Follow the product's procedure for the object, tools, residues, and waste before handling the piece normally.
An acid result identifies the response of the material sampled. It isn't a reliable whole-object percentage.
Ask what the instrument actually measured
For XRF, the operator should clean suitable test areas, check the instrument's calibration, and examine representative locations. Edges, the main body, clasp areas, and joints can reveal differences that a face-only measurement misses. Filing an interior spot requires explicit permission.
White Metal Resources' silver-testing guide explains the need for preliminary composition screening and multiple representative readings when construction or composition is uncertain. Compare the silver, copper, and other detected elements across locations rather than accepting the most attractive result.
Don't average conflicting spots into a single purity claim. Investigate whether the differences reflect plating, solder, surface condition, or mixed construction. Different readings establish a question, not necessarily a counterfeit.
For local instrument context, this explanation of Thermo DXL and Sigma Metalytics testing helps you ask which tool suits jewelry versus bullion. A significant purchase or unresolved inherited piece deserves a testing plan, not merely a printed percentage.
Fix Results That Do Not Match
A sterling-marked chain that attracts a magnet is a common source of confusion. The useful question isn't whether the stamp or magnet wins. It's which component reacted, and whether that component represents the rest of the object.
Treat disagreement as a reason to isolate the problem. Don't keep repeating whichever test gave the answer you preferred.
Give each mismatch a next action
Mismatched silver tests and what to do
| What you see | Likely cause | Next move |
|---|---|---|
| Sterling stamp but magnetic attraction | Steel core or magnetic finding | Test the body away from the clasp |
| Ice melts fast and the piece feels light | Copper or another conductive material | Use specific gravity if the construction permits it |
| Silver-like acid response on the face, base-metal response at a filed edge | Possible silver plate over base metal | Stop treating it as solid silver |
| Density looks plausible but acid fails | Sampling problem, unsuitable construction, or filler | Have the construction checked before reweighing |
| XRF face matches the claim but the edge reads lower | Plate, solder, or surface effects | Request an independent method |
| A heavy online bar passes a home test | Interior remains unverified | Withhold the transaction pending further testing |
The acid row assumes the reagent and its chart were correctly identified. An unexpected color from an old, contaminated, or unknown solution is not enough to label an object plated.
Likewise, a density mismatch doesn't tell you which hidden material is present. It tells you that your assumptions about a solid, uniform object may be wrong, or that the measurement needs checking.
Separate correctable mistakes from stop signs
You can safely resolve some disagreements without further damage. Photograph the attraction point, inspect the underside of a clasp, check whether a bubble clung to the object, or repeat a weighing after drying it completely. Keep the original result in your notes rather than replacing it.
- Correct the setup. Check scale stability, suspension contact, and whether the object touched the container.
- Separate components in your record. Distinguish the clasp, chain body, pendant, and stone setting without dismantling them.
- Preserve suspicious evidence. Leave exposed layers and unusual seams intact for the professional examiner.
- Stop destructive sampling. Don't file additional holes into bullion, antique flatware, or sentimental jewelry.
An old spoon also deserves restraint. Wear can soften a hallmark or make a thin area difficult to examine, while repairs can introduce a different alloy at a joint. Neither condition justifies calling the entire spoon fake.
> Stop point: If explaining the result requires guessing what's inside the object, home screening is finished.
For a large flatware set, test records should identify individual pieces rather than assume that matching patterns mean matching composition. For an online bar, preserve the seller's description, packaging, and purchase records. Those details can matter if testing turns into a return or dispute.
Take It to a Pro Before You Sell or Pawn
The threshold for professional testing is practical: would a mistaken identification meaningfully hurt you? An ordinary spoon may only need a counter check, while bullion, a substantial flatware set, unusual imported jewelry, or a disputed purchase deserves more scrutiny.
A competent examiner should explain what the available equipment can establish before proposing a destructive sample. Ask whether the test checks the surface, electrical response, interior construction, or a representative portion of the material.
Know when a laboratory sample is necessary
For dispute-grade analysis, the laboratory must obtain material that represents the item being valued. Cupellation, or fire assay, uses controlled furnace treatment and further separation and measurement steps, rather than relying on appearance or a spot reaction.
The ISO cupellation standard project describes a method for generally homogeneous silver materials. In practice, the laboratory selects or prepares representative material, removes interfering base metals through controlled processing, separates precious-metal constituents as needed, and applies appropriate corrections to the reported result.
Sampling is especially important for layered objects. A shaving from the outer face may describe the shell while missing the core. Ask the laboratory how it will characterize separate layers or components and, if needed, determine the silver content of the whole object.
- Ask about representativeness. Which part of the object will the sample describe?
- Request the reporting basis. Does the result apply to a component, sampled alloy, or the complete item?
- Check uncertainty. Ask for the laboratory's validated precision, recovery information, and relevant proficiency-testing record.
- Approve damage in advance. Agree on sampling locations and understand whether material will be consumed.
No method name alone guarantees a universal level of accuracy. A defensible report depends on the sampling plan, controlled procedure, and the laboratory's demonstrated performance.
Arrive prepared to discuss the offer
Bring your hallmark photographs, dry weights, purchase records, and a brief list of conflicting results. Tell the examiner where acid was applied or metal was filed. That prevents an altered spot from being mistaken for the original surface.
For help preparing a visit, this guide to finding a silver appraisal near you provides local context. Ask to see the scale reading and understand which components are included in the payable weight.
A pawn loan offers a contractual opportunity to redeem the item; a sale transfers ownership. Review the repayment terms for a loan, and agree on the weight, tested composition, and offer before signing either type of transaction. Metal content and the amount offered are related, but they aren't the same calculation.
If a shop won't explain its weighing or treats obvious plating as solid sterling, pause the transaction. Your home notes should help you ask better questions, not pressure you into accepting an unexplained price.
---
Bring your silver, mark photographs, and testing notes to Idaho Pawn & Gold Exchange for professional screening and a discussion of selling or using eligible items for a pawn loan. Visit a Boise, Meridian, or Nampa location and ask which test suits your piece, what the result establishes, and whether further examination is needed before agreeing on a value.